Wednesday, May 23, 2012

Welcome Elizabeth!

Alright, I didn't make anything this week.  Well, I did, but not something replicable that you too could make.  On Friday night we welcomed Elizabeth to the family! 

Spencer and Elizabeth

She looks frighteningly similar to her brother, but her temperament is completely different.  When Spencer was brand new he would thrash around and couldn't stand to be swaddled.  He would not be put down without screaming bloody murder, which made nights particularly interesting. 

Elizabeth, by comparison, is extremely chill.  She only seems to cry when I change her clothes or diaper, and has only been waking up once a night to be fed, and otherwise sleeps quite soundly in the bassinet next to our bed.  From what I understand, this is what my husband was like as a baby, so I might have lucked out (I really hope I don't jinx myself!). 

  
Let's just pretend her shirt isn't covered in spit-up...
Anyway, I'll be back next week with a legit post.  For now, I'm just soaking up my baby time.

Wednesday, May 16, 2012

Fruit Roll-Ups


About a quarter of my haul
Saturday was the very first day that Liberty Mills was open for strawberries.  We went there last year to get our berries for making sugar free jam, and it was so fun, I thought we had to go again.  Never mind that it was 2 days before my due date, I’m not one to sit around when there are berries to be had!  

We got a 4 quart flat in an hour and headed home to make jam…  Till I got home and realized I was completely unprepared for jam!  Okay- plan b: wash, hull, process, and freeze all the berries needed for a double batch of jam.  And now what to do with the remaining 2.5lb?  Well, I froze those hulled, ready for smoothies.  Then I remembered the Martha Stewart video I saw on Swagbucks on making your own fruit roll-ups.  Yes please!

I cut the strawberries with apples because that’s what the 365 brand strawberry fruit snack has that my son loves so much, and because if you had to buy the fruit at the store, apples are generally much cheaper (plus if you are at Whole Foods with your kid, they will give you a voucher for a free apple at customer service).
It's a pretty rare treat for him, but Spencer loves these things!

You will need

1 lb fruit, any kind (.5lb apples: free, .5 lb strawberries: $15 per 6.5lb hulled berries, $15/6.5 = $2.31 x .5lb = $1.15)

2/3 cup sugar ($3.29 per 5 lb, $3.29/80oz = $.04 x 5oz = $.21)

What a pound of apples and strawberries looks like

About half way through the cooking I decided the apples needed to be cut a little smaller if it was ever going to cook all the way through.

After cooking down, it was ready for the food processor.

Peel and chop apples and combine with the strawberries and sugar in a small saucepan.  Stir over low to medium low heat for 40 minutes until thickened.  Pour the fruit mixture into the food processor and process till smooth.  Dump the fruit puree into a fine mesh strainer and strain back into the saucepan, discarding any chunks that didn’t fit through the strainer.  Give the fruit a stir, then spread them evenly on a silicone mat on a rimmed baking sheet (If you don’t have a silicone mat, lightly grease the baking sheet).  Bake for about 2 hours at 200 degrees.
I strained it into the pot so it could be stirred before being spread out on the sheet.
My husband gave me this mat for Christmas.  It's been great!

Once it’s out of the oven, allow it to cool a few minutes, then put parchment paper over the entire sheet, and flip it over.  Gently peel back the silicone mat.  Cut the fruit to the size you like (Martha used a pizza cutter, but I thought a sharp knife worked just fine).  Roll them up and store in an airtight container for up to 2 weeks.
After baking.  I should have tested it in the middle.
Ready to flip.

Well, this is how it was supposed to go…  I just was not going to stir a pot for 40 minutes.  I stirred it till it was all combined, and I stirred for the last 10 minutes, but it meant that not as much liquid evaporated as it would have if I had followed instructions.  I also made the mistake of waiting to start this process after Spencer went to bed, so by the time 2 hours in the oven went by it was 11pm.  It looked a little sticky, but I thought it would be fine.  Not so- the middle was still too wet and didn’t peel properly. 

Flipped onto the parchment.  Can you see how wet it is in the middle?  It wouldn't even hold together properly!
I cut the fruit with a knife, then the parchment with scissors.  I rolled them into long strips, and cut off pieces as needed for lunches and snacks.
Messy middle = delicious late night snack!
Despite my issues, this stuff is fantastic!  Since the middle was too wet, I just ate it then and there.  Mmm.  Before you cut the sugar (as I was tempted to do), try a batch at regular strength.  Once it gets down to the final product it doesn’t taste as sweet as you might think.  It probably would be great with honey instead of sugar; I’ll probably try that on my next batch.
Close up of the final product.  Delicious!

Try It

Well, it’s a little hard to compare since I ate a chunk before I measured it in any way, but let’s say it’s about the size of 8 365 brand fruit snacks.  That’s $1.36 for 8 snacks, or $.17 per snack.

Buy It

$.59 per 365 brand fruit snack.

Verdict

Definitely Try It!  Even though it took a while, it was really easy, and if I’d been a little more patient with the baking process I don’t think it would have mattered that I didn’t stir for 40 minutes.  Plus they are crazy good, and like the granola bars, I love that I can customize the size of my kid’s treat.

Wednesday, May 9, 2012

Chocolate Hazelnut Spread


The other day I was crushed when I used the last of my Nutella.  Now, I could have just bought another jar, but that plastic jar gave me a twinge of guilt, and I thought I’d do a web search and see just how hard it might be to make.  What I found is there are way too many recipes, and they are all pretty similar.  I looked at America's Test Kitchen (just the free version), and thought that while their general recipe seemed delicious, it also looked pricey.  The one on Allrecipes didn’t get very good reviews, and the one on Food Network contained a can of condensed milk, and I thought it might not hold up well over time.  So I took all that information and came up with my own version.
So sad.

You will need

1 ½ cups hazelnuts ($8.99 per lb, $8.99 x .5lb = $4.49)

¾ cup chocolate chips ($2.99 per lb, $2.99/16 oz = $.19 x 4.5oz = $.84)

½ tsp homemade vanilla ($.01 per ml, $.01 x 2.46ml = $.02)

2 Tbsp powdered sugar or to taste ($1.99 per 32 oz, $1.99/120 Tbsp = $.016 x 2 = $.03)
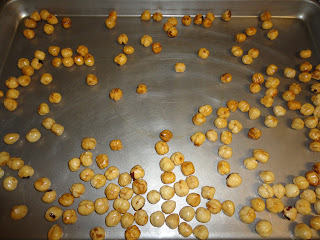
Roasted and ready!

Roast your hazelnuts on a rimmed baking sheet at 375 for about 12 minutes.  If the nuts still have the skins on them, put them in a bowl with a second bowl over them and shake vigorously until the skins come off (by the way- this is also how you can skin an entire head of garlic in seconds).  Skins will make the spread bitter, so make sure they come off (I found skinned ones in the bulk section of Martin’s).
I could have ground them a little finer, this is like when the peanut butter becomes a giant ball.
The two main ingredients.

Transfer the hazelnuts- still hot- to a food processor, and process until fairly smooth, scraping the sides as needed.  This takes a while, and sometimes it gets all stuck on the sides.  Basically it’s the same process as making peanut butter.  When you like the texture of the nuts, throw in the chocolate chips.  They’ll melt really quickly.  Scrap down the sides and add the vanilla and sugar, blend till combined.  

You may decide you don’t want any sugar at all, or you may like it sweeter than I did, just add it slowly and remember that added sugar will affect the texture a bit.
Extra tasty on a Petit Beurre cookie!

Try It

$5.38 for about 1 ½ cups, or $.22/Tbsp

Buy It

$4.39 for 13oz, or $.22/Tbsp

Verdict

They’re the same price, and it took very little time.  I think this one is going to come down to just how hooked you are on the silky texture of Nutella.  I was a little surprised to find that I prefer this homemade stuff- it’s a little gritty, but in a nice way, and I like being able to adjust the sweetness.  I’m going to Try It!

Tuesday, May 1, 2012

Bib or Nursing Cover Strap


When Spencer was nursing he was a flailer.  He would kick off any blanket I tried to put over him, and as a result I gave up trying to nurse in any kind of public area.  Now that I’m gearing up for baby girl, I wanted a nursing cover, but it seemed like one more thing I’d have to carry around.  I told my friend Erin that what I really needed was a dental bib cord, and she pulled out an adjustable strap with clips on both ends made specifically for nursing.  Brilliant!  I looked into buying one, but they’re $12, and that seems like a trivial thing to spend $12 on, so I thought I’d make one myself.

I wanted it to be adjustable because it can also be used as a makeshift bib by clipping it to a napkin.  Unfortunately I could not for the life of me get my hands on a slider without paying at least $5 for shipping, which I was not willing to do.  I even considered going to Goodwill for a cheap purse to hack the slider off of, but then my husband suggested Velcro instead.  Velcro was a great idea, but I already owned a sizable stash of buttons, and really it only needed 2 settings- the largest and the smallest.  I finally had my design!

You will need

One piece of cloth, 24” x 2 ½” (free)

1 set mitten/suspender clips ($2.99)

2 buttons (free)
 
My cut cloth amongst the button collection.

Right side out and ironed.
Sew the cloth together right-sides touching length-wise.  Turn the tube of cloth inside out by attaching a large safety pin to one end and send it up through the middle of the cloth inching the tube over the pin.  Iron the cloth flat.  Sew one of the mitten clips to one end, tucking the raw edge under or inside the tube before sewing it down.
I know I've mentioned before I'm not much of a seamstress.
Raw edge tucked inside and sewn shut.
This is how close I sewed the button to the buttonhole.  Note that I had to change buttons because my originals were too fat for the mitten clip to slip over.

On the other end, turn the raw edge of the cloth into the tube and sew it flat.  Sew a buttonhole on that end the size of the button you’re using.  Then sew a button close to the buttonhole, and another by the opposite end.  Put your mitten clip on and you’re ready to cover!

At nursing cover length...
...and bib length.

Spencer reluctantly models the strap as a bib.
Try It

$2.99 for the whole project.  My cloth was a Christmas gift from my father-in-law, and who knows where 
the buttons came from! 

Buy It

Between $7.99 and $12 from various companies, adjustable and not

Verdict

If this is a product you’d use, I would Try It.  It was an easy evening project that I think I’ll use a lot.  I had a few hiccups, but it came out alright in the end!