Tuesday, November 22, 2011

Cranberry Sauce

Thanksgiving is my absolute favorite holiday.  It’s not built up, or dragged out, it’s just a great meal with family and friends, and a day set aside to be thankful for everything and everyone we have around us.  What a concept! Plus, the food is generally simple and inexpensive, mostly native to the US, and always delicious. 

We always had canned cranberry sauce growing up.  I never could stand cranberry sauce, I disliked the texture, tartness, and presentation.  I clearly remember the first time I had homemade cranberry sauce.  I was in college, and my sister had just moved to New Orleans.  She wasn’t going to make it home for Thanksgiving, so I went down to spend the holiday with her.  We made a whole feast, even though there were only three of us.  I don’t know what made us decide to make the saucy leap, it might have had something to do with the combination of our first Thanksgiving we cooked ourselves, and the fact that my sister had spent the previous Thanksgiving in Ireland, and was keen on doing it up right.  In any case, at the time, it was mind blowing for two reasons:  It was so tasty, and insanely easy.

I have tried a few variations since that New Orleans feast- apple cider infused, orange cran.,  and they’re fine, but I prefer the basic recipe on the back of the Ocean Spraycranberry package myself.

You will need

1 cup sugar ($3.00 per 5lb, $3.00/80 (servings per bag) = $.04)

1 cup water

12 oz cranberries, fresh or frozen ($2.50)

I love how they all pop in the heat.
Bring the water and sugar to a boil over medium heat.  Add the cranberries, bring it back to a boil.  Then turn the heat to low, and simmer for 10 minutes, stirring occasionally.  Pour it into whatever you’re going to serve it out of, and let it cool to room temperature covered.  Then refrigerate till you’re ready to use it.
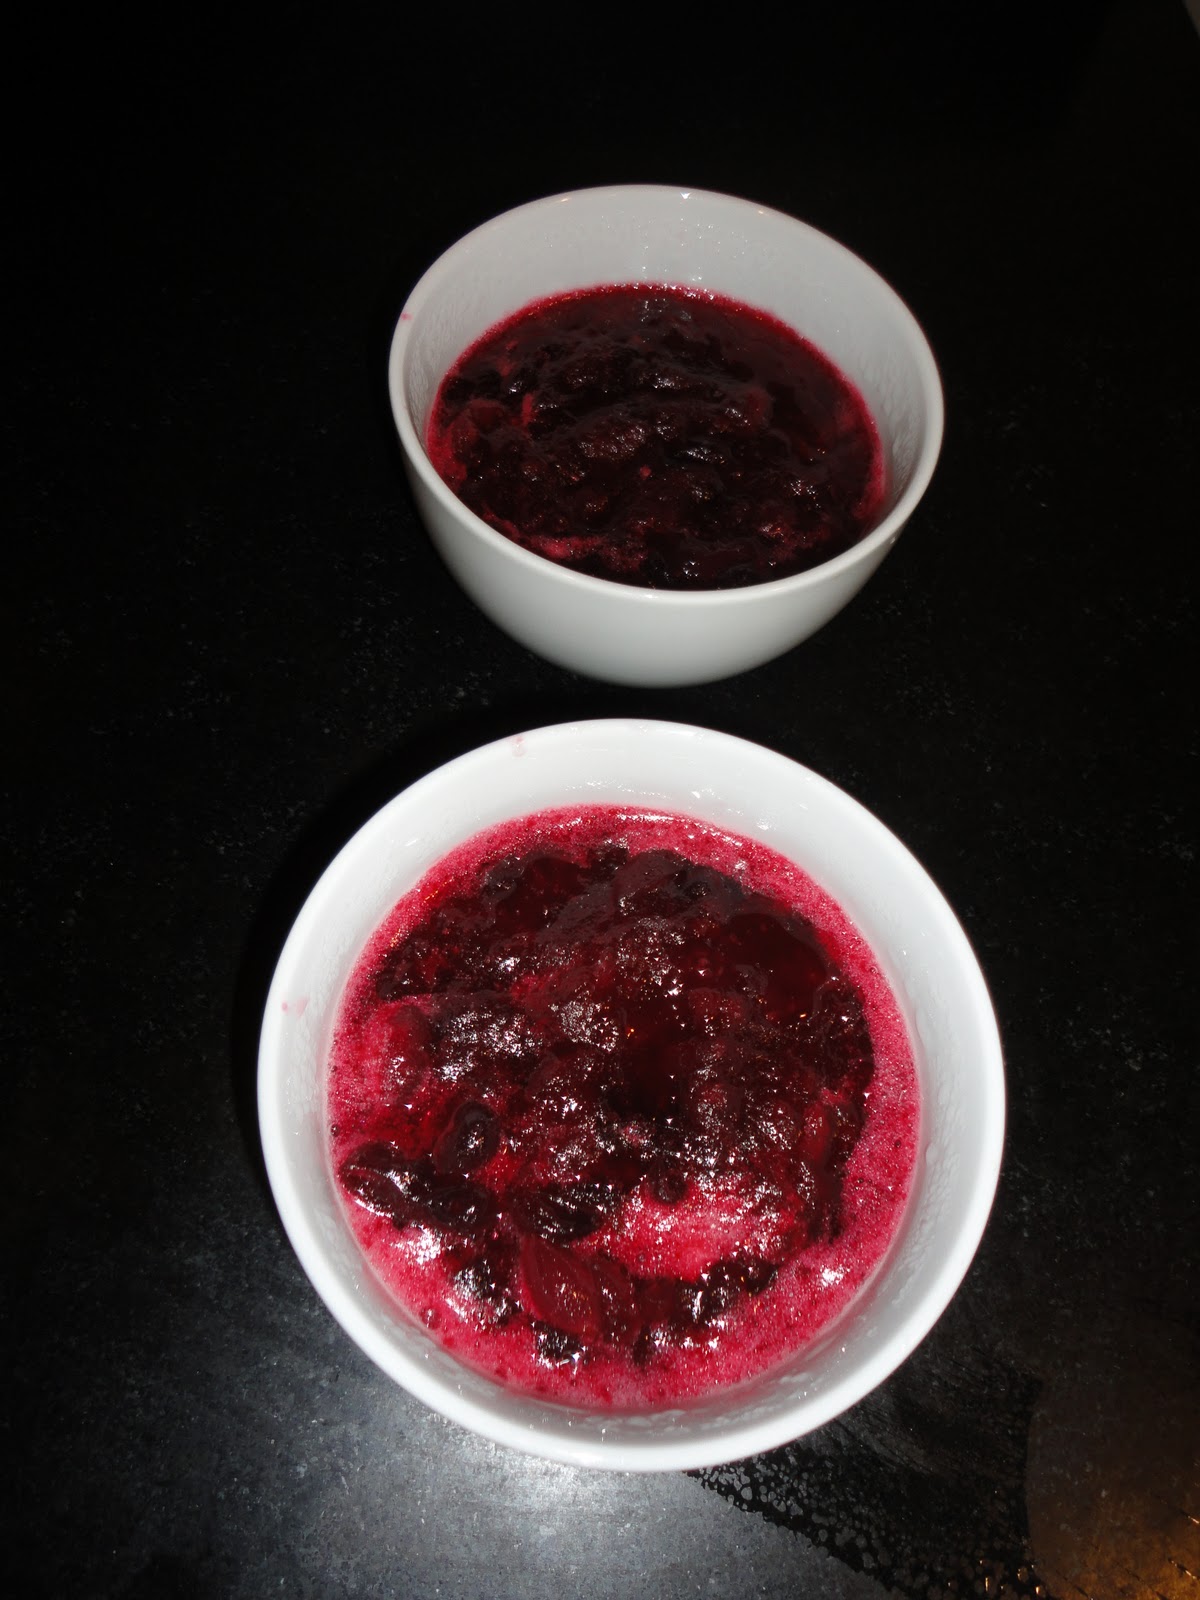
Cooling on the counter
Ready for Thursday, one for each end of the table.

Try It:

$2.54 for 22.5oz, or $.11/oz.

Buy It:

$1.50 for 14oz can of whole berry Ocean Spray sauce, or $.11/oz.

Verdict:
It’s the same price, has no corn syrup, and is actually worth eating!  Absolutely Try It if you haven’t already, even if you always thought cranberry sauce was disgusting!

Wednesday, November 16, 2011

Thin Wheat Crackers


We eat a lot of Wheat Thins in this house, generally accompanied by hummus or cheese, but also just by themselves.  I was a little nervous about making these because we are all so fond of the store bought variety, but I thought  it was worth a shot.  I followed this recipe from Allrecipes.
Ingredients, ready to go
You will need
1 ¾ cups stone ground organic wheat flour ($1.39 per lb $1.39 x .656 lb = $.91)
1 ½ cups organic all purpose flour ($1.39 per lb, $1.39 x .516 lb = $.72)
2 tsp salt ($.79 per 26 oz, $.79/122.75 tsp = .006 x 2 = $.01)
1/3 vegetable oil ($2.49 per qt, $2.49/ 12 1/3 c servings = $.21
Mix it all up
Roll it out and transfer to a baking sheet
The secret to these is rolling them very thin, and baking them till they are decently dark.  If they aren’t thin or crispy enough they taste like salty cardboard.  Baking them for 25 to 30 minutes lets all the moisture out and allows the wheat flavor to shine.  The recipe says it will all fit on one sheet, which is what I did, but they were too thick.  The edge pieces were good, but the center was too thick, and too cardboardish.  Someone on the site recommended a pasta roller which sounds like a really good idea, but I don’t have one.  There also bands you can buy to put n your rolling pin to ensure even thickness, but I don't have those, either.
Score the dough into small crackers, poke it all over with a fork, and throw some salt on it.
once they're cool, break them on the score marks and enjoy with your favorite dip
Try It:
One batch cost $1.85, for about 20 oz, or $.09/oz
Buy It:
A Family Size box of Wheat Thins cost $4.49, or $.28/oz
Verdict:
They’re not my favorite.  I would Try It once, and see how you like it.  They’re so easy and cheap you won’t set you back anything, but I don’t know if I’ll make them again, I’d rather Buy It.
Anyone have a better cracker they’d like to share?

Monday, November 7, 2011

Christmas Tree Ornaments

Crazy as it is, Christmas is upon us once again.  By the beginning of November I like to have at least a basic plan for gifts, since a few years back I switched to making bags of homemade things in lieu of store bought gifts for most of my family.  One thing I like is homemade ornaments.  There’s a whole range of homemade ornaments on our own tree- We have hand carved wooden ones from my father in law, mixed medium ones from my sisters in law, crocheted ones handed down from my husband’s grandmother, and re-purposed items turned into ornaments (a tradition in my family).
Old toys make great ornaments!

hand carved boot and beautiful dove from my father in law

Fun wire and bead ball from my sister in law

Heirloom crocheted balls and my crocheted snowflakes

Handcrafted ornament from my sister in law

There are also two things I made on our tree.  Last year I taught myself to crochet from watching youtube videos so I could make snowflakes.  I found these great instructions on MarthaStewart, and cranked out enough for two styles for each of my recipients.  There are also these adorably hokey reindeer I figured out based on ones on our tree growing up.  My favorite part is that it’s the perfect size to hide a Hershey's kiss inside!

You will need

Googly eyes ($2.99)

Brown or tan pipe cleaners ($.99)

Brown yarn ($2.99 for 364 yards)

Plastic craft grid ($1.99)

Small red pom poms (about $.99, we've had them for years)

Large needle- either a tapestry needle or a plastic canvas needle, not a yarn needle, it's too big ($1.29)

Glue (craft or Elmer's) ($1.49)

Cut out three 10 x 10 squares out of the grid, snipped at the lines so there aren’t stubs on the edges.  Cover all three grids on yarn, working diagonally over the crosses.  Connect the three squares, tucking all the yarn in, knotting and tucking as needed to secure the ends.   On the mouth, go around the edge to cover the plastic around the edge, going through the corner three times to cover the whole corner.  Poke the pipe cleaner through the top sides and bend to shape the antlers.  Glue the eyes and pom pom nose on.  A little ridiculous? Sure, but wonderful all the same.


I kept going onto the second square for efficiency's sake, then bound two sides to form 1/2 the mouth

This shows the back of the squares.  Notice the yarn has been threaded though the yarn on the back so I could sew up the whole 1/2 mouth in one go.

1/2 the mouth and the back

Third square, two sides bound to form the other 1/2 of the mouth.
Looking at the side, while holding the mouth shut.

All sides bound and put together, ready for the trimmings!

The antlers are stuck through the back towards the top.

And done!  the antlers are just twisted, and the nose and eyes are glued.
 Try It:

If you had to buy everything new, you're looking at $12.73 to make oodles of reindeer. At this point in my crafting career, I had to buy nothing.

Buy It:

Well, I doubt you will find this for sale, but ornaments span the whole price range depending on what you're looking for.

Verdict:

Really, this is a decision based on aesthetics.  For me it's Try It, because I really love funky ornaments, but I realize it's not for everyone.

Monday, October 31, 2011

costume cloak

So in case you didn’t notice, I never posted last week.  It’s not that I didn’t make anything, I just ran out of time between work, an essay I had to write, preparing for Halloween, and everyday life.  What I did make was a big mess that was supposed to be chocolate haystacks (my chocolate seized), and a Halloween costume for my 2 year old.
My little Hobbit

My son happens to be obsessed with the animated version of The Hobbit, so it was only fitting to make him a Bilbo Baggins costume for Halloween.  (Don’t know what I’m talking about?  It’s on youtube in 6 parts, check it out!)  The whole thing cost me about $9, mostly in fleece for his cloak.  The cloak was so easy, and came out so well, that I thought I’d share.  While I realize this is not helpful for this Halloween, if you or someone you love likes to dress up on a regular basis (like my kid, or my college roommate), it's an easy project.

You will need:

Fleece material (depends on the size of your cloak, I needed 40”) ($5.55)

Coordinating thread (free, left from previous projects)

marker and a string (free, found in the house)

I used this very helpful though somewhat odd set of directions for the cloak.  I’m embarrassed to admit I had to look up the formula to find the diameter of a circle in order to measure the cloth needed: d = c/Ï€ (my Algebra teacher husband wasn’t home).  
Measure around the neck for the inner semi circle.  Measure from the collar to the end length for the flat edge.  So in our case, the neck was 5½“, and the length was 27”.  To cut this part of the cloak out, fold your cloth in half and smooth it out.  Tape your string to the sharpie, measure out your radius (27¾“  in our case), and hold the non sharpie end to the corner.  I did this with a large sewing needle taped to the string shoved into our carpeted floor, but you could just hold it steady.  Hold the sharpie as level and steady as possible, and draw a quarter circle onto the fabric.  Repeat this process for the inner circle (in our case, a 1¾“ radius).  Using your sharpest scissors, cut out your cloak with the fabric still folded.  Keep in mind that there is no hemming, so this edge will show!  Cut carefully and be mindful of which side of the sharpie line your cutting on so it doesn’t show up on the cloak.  

The second part is the hood.  This is a rectangle.  The short side is the depth of the hood; if you like an overhang, add a few inches.  The long side is the length from your shoulder, up over your head, down to your other shoulder.  To create the hood, fold the long side in half and sew it up.  Sew the hood to the neck semi circle of the other part.  My hood length and collar length didn’t match, so I sewed it on, matching the halfway mark of both pieces up, then I laid the cloak down on my cutting mat and just cut off the excess diagonally (leaving the full depth of the hood on top, but getting all the extra hood off at the collar).

Laid out, it doesn't look great, but it shows the diagonal cut on the hood
The only thing left to do is to figure out how you’re going to close it.  I thought about buying a cool metal closure, but it would have added $4 to the cost, so I opted for ties instead.  Using the scrap fabric, I cut ½“ thick ties about 6” long.  Using my sewing machine, I tacked it to the cloak collar.  After cutting all the dangling threads off, it’s done!

Wow, that took a lot to explain.  Definitely look at the original instructions here for some visual help.

Try It:  

 The fleece was on sale for $5.55

Buy It: 

The cheapest cloak I saw on the Halloween Express website was $12.99.

Verdict:  

 As a rule, I’m a big fan of homemade costumes.  The cloak took about an hour, and was fun to make.  I will note, this is strictly for dress-up.  It's not a professional wear everyday type cloak.  But for someone like Spencer, I will definitely say Try It.

Monday, October 17, 2011

Applesauce

A few years back my husband had a student whose parents would send us a box of apples at Christmas.   The first year I made a bunch of pies and gave them away, then I got wise and pulled out my jars.  Applesauce is very easy, and amazingly delicious.  Plus, you can have it exactly the way you like it- smooth, chunky, plain, sweetened, flavored….  It’s great.

Spencer as a caterpillar at Carter Mountain
I took Spencer up to Carter Mountain Orchard, a beautiful pick your own spot.  We didn’t have time to pick, so we rummaged through the bins, choosing sweet apples- empire, golden delicious, Jonathan, McIntosh, anything that came with the cheaper price tag and the description of sweet. 
12 Carter apples + 1 leftover apple from lunch

You will need:

12-13 apples, about 6 lbs ($8.09)

Cinnamon (optional) ($1.97 for 2.37 oz, estimated $.19)

Pint Ball jars ($10.99 for 12, $10.99/12 = $.92 x 5 = $4.58)

Peel, core, and roughly chop apples.  Put them in a large pot over medium high heat with a few inches of water (this is vague, but that’s what I did.  If it looks too wet, cook uncovered).  Cook until apples are very tender, 15-20 minutes.  While the apples are cooking, sterilize 5 pint jars (or 10 ½ pints).  Once the apples are soft you have to decide what you want.  If you like chunky sauce, mash them with a potato masher.  My son likes smooth sauce, so I ran it though the food processor.  Then I put it in a bowl (I needed the pot, but the pot would have been better) and added a teaspoon of cinnamon.  I know that amounts to a pinch, but I really just wanted a hint, cinnamon is often overpowering to me.  Pour the sauce into the jars, seal them up, and process them for 10-15 minutes.  If you have any leftovers, eat them hot!  It’s so good!
Chopped apples ready to cook (I took out some of the water, this was too much)
Mmmm.  Smells delicious!
Steaming applesauce with a swirl of cinnamon
Canned and ready.

Try It:

$12.86 per 5 pints, or $.16/oz (including reusable jar)

Buy It:

$4.49 per 32 oz of local applesauce (what I normally buy), or $.14/oz

Verdict:

Well, it’s cheaper than store bought if you leave out the jar, but it would still be cheaper to buy Mott’s or store brand.  It’s a good project, though- easy, quick, and tasty.  For me, I’ll keep trying it, but if you’re looking to save cash, buy it.  (Or cut your apple costs by rummaging the seconds bins at your local orchard)
Enjoying the warm leftovers

Monday, October 10, 2011

Tortilla Chips


Years ago a friend of mine made fresh tortilla chips for my family.  He must have thought we were barbarians, we scarffed them up so quickly not a single chip made it into an actual bowl, much less got dipped in anything!  I remembered them looking easy, so I thought I might be able to do it on my own.
 
My sister Margaret and I got together with a bag of tortillas, a bottle of oil, and no plan.  After putting on aprons, we put about 20 oz of oil in a deep sided skillet over medium high heat, then set up cooling rack in a rimmed cookie sheet beside the pan.

You will need

1 bag corn tortillas, 30 count (on sale for $.89)

Vegetable Oil ($3.37 per 48 oz, $3.37/48 oz = $.07 x 20 oz = $1.40)

Salt ($.79 per 26 oz, $.79/40.92 Tbsp = $.02 x 3 = $.06)
Next stop- Frying oil!

Cut the tortillas into sixths, and set to one side of your heated oil.  Working in batches of 8 or so chips, scatter the wedges in the oil, and fry until they are starting to turn brown.  They will continue to brown a little after you take them out.  Fish them out with a slotted spoon or tongs, and lay them on the cooling rack.  Sprinkle with salt, and transfer to a bowl when they cool. I'm not big on paper towels, but if you have them, I would suggest lining your bowl with them because our chips were pretty greasy.
The basic line- plate to fryer to rack to bowl.

So were they crazy delicious?  YES!  They also made my whole house stink like a fryer, baked oil splatter into my favorite pan, and made a huge mess.  I forgot to turn on the stove fan (a reoccurring mistake for me, not having grown up with one), which might have off set the first issue.  The big mess wasn’t that hard to clean up (Unlike boiled over jalapeno jelly!!), and if I ever feel super motivated, I know I can get rid of the spatter. 

We don’t usually have tortilla chips in our house, so for me they were an extra special treat.  Unsurprisingly, Margaret and I ate a ton of them while we manned the frying process, so by the time we were done, I really never wanted to see them again.  Margaret took a good chunk of the leftovers up to New York to our sister Rosemary, who said they were still amazing days later. 

Sadly (for me), this was Margaret and my last joint experiment till at least June, because she moved to Chile last week!  I miss my partner in crime, but I know she’s enjoying herself down there. 
Bye Margs!

Try It:

$2.35 for 18 oz, or $.13/oz

Buy It:

Utz white corn rounds $3.50 for 17 oz, or $.21/oz

Verdict:

Try It, they're very tasty and cheap.  

Monday, October 3, 2011

Diaper Wipes

We've been cloth diapering for about a year and a half.  I won't bore you with all the details and decisions we made, but I will say this:  It is cheaper and easier than I ever imagined, and I wish we had started earlier.  One thing that keeps the cost low is cloth wipes, which are easily made with things you can find around your house, and can be used over and over.
Cloth is cute, cheap, and a lot less work than I thought.
Don't have a kid in diapers?  No sweat.  They also make awesome handkerchiefs and cleaning rags.  I have one in my pocket right now, trying to help me through a head cold.  If you are looking for a clever tissue replacement, also check out this post on My Plastic-free Life

You will need

An old t-shirt (free, my husband updated his undershirt supply)

Some flannel (free, in the form of a couple old receiving blankets)

Thread (free, left over from various projects)
Two sizes, two patterns, endless uses.

Cut 8 inch squares out of both materials.  Match them up, right side out, and sew a zigzag stitch around the edges.  Done.  
 They don’t even have to look nice, you’re going to be wiping poop (or snot, or dirt) with them.  Use whatever thread is already in your sewing machine, stick the bobbin with the ugliest color on it in there and you’re good to go.  I also made some 4 by 8 inch wipes, which fit in a wipe carrier, and also double really well as a soft liner for rough flats (the old school cloth diapers).  
Try It:
Free
Buy It: 
OsoCozy 15 pack of flannel wipes, $12.39 on Amazon, or $.83 per wipe.
Verdict:

Try It.  It’s free and really simple.